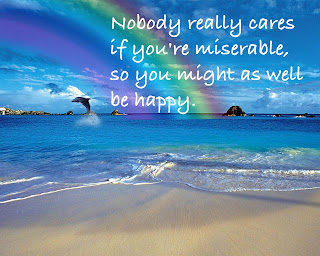
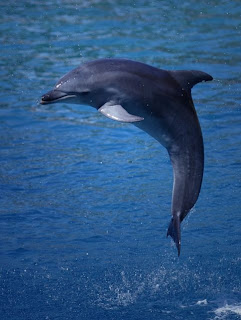
For my final project, I created my image with a tutorial from my previous blogpost. It is just a simple photo of a beach with a rainbow. However, I did add one photo to make my art more attractive. I used a photo of a dolphin, jumping out of the water. I added this, and it made my art pop. Next, I used a quote that I found on on the internet and it is, "Nobody really cares if you're miserable, so you might as well be happy." This sends a clear message to everyone. Last, I made it 10 by 8 photoshop document at 200 dpi. Adding the quote made my image graphic design, as it motivates, is an opinion, and sends a clear message to everyone.
Monday, June 20, 2011
Final Project
For my final project, I created my image with a tutorial from my previous blogpost. It is just a simple photo of a beach with a rainbow. However, I did add one photo to make my art more attractive. I used a photo of a dolphin, jumping out of the water. I added this, and it made my art pop. Next, I used a quote that I found on on the internet and it is, "Nobody really cares if you're miserable, so you might as well be happy." This sends a clear message to everyone. Last, I made it 10 by 8 photoshop document at 200 dpi. Adding the quote made my image graphic design, as it motivates, is an opinion, and sends a clear message to everyone.
Friday, June 17, 2011
"Rainbow In Photoshop" Tutorial
For my final 50 points of the needed 200 points in the fourth quarter, I decided to do a simple tutorial on how to create a rainbow in photoshop. This was an easy ten step tutorial, yet portrays a very well designed scene.
For the first part of my project, I used an image of a sandy beach as the background for the Rainbow. This was a very simple, yet effective picture.
For the second and final part of my project, I added a radial gradient with rainbow colors. I switched the opacity level to 45%, and there you have it. A rainbow in Photoshop.
Wednesday, June 15, 2011
Alphabet Name Project
For my second project, I used Photoshop and assembled my name while using text tutorials. I simply used a different tutorial for every letter in my name. The website I used for the various tutorials was: http://www.photoshopessentials.com/photoshop-text/text-effects/. I placed each letter in a different photoshop file, then when I was done, I brought all the letters on to one document.
Fire Text Project
For my first project, I used Photoshop to create a Fire Text image. The tutorial I followed to make this image was: http://psd.tutsplus.com/tutorials/text-effects-tutorials/dramatic-text-on-fire-effect-in-photoshop/. I really like the way this image came out. It is a very unique design that took some hard work. What I like best about this photo is the way it attracts the eye through the orangish color.
Subscribe to:
Posts (Atom)